Flag conservation

Flag conservation
Textile conservator, Gwen Spicer of Spicer Art Conservation at work

Friday, November 28, 2014

Conserving, then mounting a pair of Leather Gloves with magnets

It has been a while since we at SAC have blogged about magnets. But that is not because magnets have not been on our mind! In fact, we have been quite busy working with them. So we thought that we would share a magnetic mount that we have recently designed. And with it, discuss the idea of using a Universal Standard Language to discuss magnetic mounts, so that they can be understood and replicated by other conservators and mount makers.

The pair of gloves to be mounted had been worn to Abraham Lincoln's funeral on April 19, 1865 in Washington, DC by Robert Van Valkenburgh, a United States Congressman from New York and a Union Army officer.


The gloves are Paris made, as indicated from a stamp that appears inside one glove. They have been owned by the New York State Military Museum for many years and had been in a museum display in the early half of last century. For their upcoming exhibition, the New York State Millitary Museum wanted them again to be included in a short-term display. These 150+ year old gloves are made of fine thin leather, and both gloves together are quite light in weight.

After some humidification, a mount was created where one glove was palm down and the other was palm up. The gloves were quite stiff and misshaped from being wrapped and stored flat. Holes were present from a previous mounting method. The once black color of the outside of the leather had begun to powder and flake, mainly along the fold lines. Due to their fragility, a mount using magnets was created.

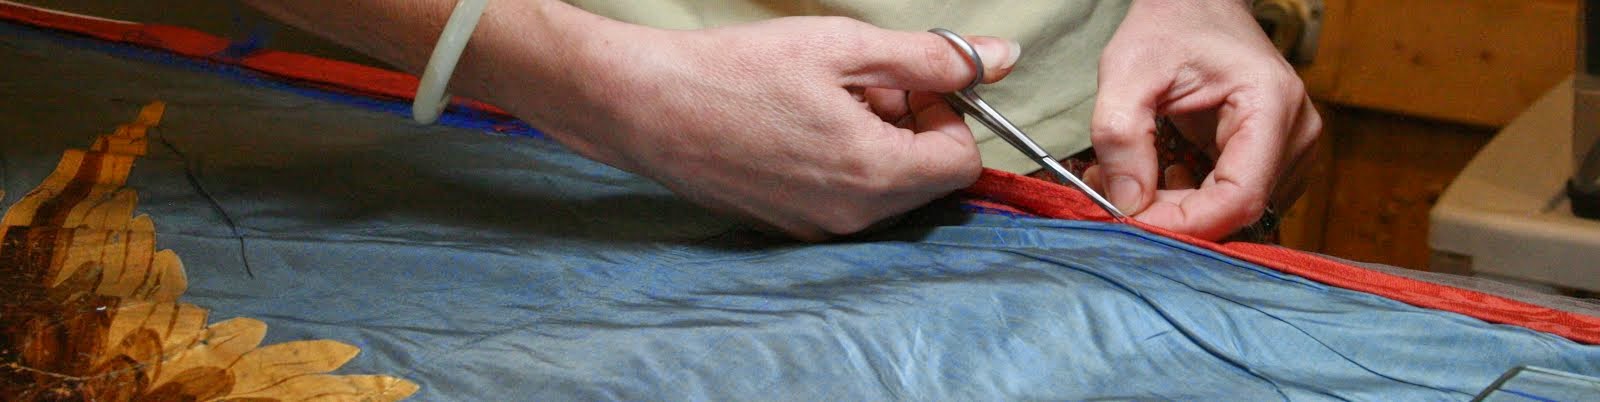
Once the shape of the gloves were determined, an internal form using Nomex was created for the fingers and palm for each glove. The thumb was supported separately. Attached to the Nomex were stitched two "L" brackets. They were positioned to support two of the fingers (image below).

magnetic display mount for museum, Lincoln assassination, art conservation, historic garment
The "L" brackets were selected to also support the fingers, as well as the palm of the glove

magnetic mount of artifact for museum display, art conservation, Lincoln assassination, rare earth magnets
Nomex layer with the attached steel brackets, also covered with foiled-paper tape.

The brackets were both stitched with button hole thread (top photo above) and covered with foiled paper tape (directly above). The edges of the brackets were outlined with Volara framing tape in order to cushion the hard edges of the steel bracket. This was to be the side that faced the mount. The visible side of either glove was carefully padded out with layers of 1/4" Volara foam.

Rare earth magnets used to mount artifacts in art conservation and museum display. New York State Millitary Museum
Internal support and the Glove

Much can be discussed about the nuances of the internal support and the creation of the mount. Both of which are also important, but for this blog, it is the magnet system that we are focusing on.

Block shaped, 1/2"x3/8"x1/8", N42 Neodynimium rare earth magnets were used and secured to the mount. I have begun to think that magnets should be secured to the mount rather than incorporated with the artifact.  For one, the mount can be reused, and having the magnet positioned in place could potentially be useful. Where as if installed in the artifact's internal structure, the magnet might stay there. With the cost of rare earth magnets increasing, and also with the unknown long-term effects, magnets kept within artifacts might be ill advised. Also, keeping an "active device" such as a magnet inside the artifact may cause inadvertent harm. What I mean is that we at SAC often speak of the "one-mindedness" of magnets. Magnets are always "on", and they will jump to a receiving metal as quickly as possible. If you did not know that an artifact had a magnet inside of it you could place it on or near something you actually do not want it to magnetically attach to.

Magnetic mount created for display of artifact from New York State Millitary Museum. Art Conservation
Magnets glued to the Plexiglas and covered with foiled-paper tape.
Positioned magnets with the Volara layer. Thin Volara
was added over the magnets to fill the recess. 

Gwen Spicer is the preeminent art conservator when it comes to treatments or creating museum mounts using rare earth magnets
Before the show fabric has been placed on the volara, but here is how the gloves will be positioned when they are displayed.

In each of the papers I have published, or any of the presentations I have given, I talk about magnetic systems as being a three part system; 1) the strength of the magnet, 2) the ferromagnetic material and 3) the gap. As a means to begin to clearly illustrate my system to others, a form of language to describe the system is necessary. How do we begin to think about and write the three parts of a system? Below is my attempt to begin a discussion. The mount description is in brackets and begins with the bottom most layer first. The artifact is listed in italics and the internal structure within the artifact follows within the braces (aka squiggly brackets).

1. The position of the magnet is indicated by an asterisk. The grade and size of the magnet is in parentheses and follows the asterisk: *(grade, shape, size)
2. The ferromagnetic material, is underlined, it's gauge and/or thickness follows in parentheses.
3. The gap layers are in bold.

[Plexiglas, *(N42, block-1/2"x3/8"x1/8"), foil paper tape, Volara tape, show cover fabric] artifact (thin calf leather), {foil paper tape, steel bracket (1/16" thickness), Nomex}

Is this word diagram of mount layers (illustrated below) sufficiently explained so that another conservator or preparator can recreate this magnetic mount? What part of it is not understandable? How does this need to be changed?

cross section of Gwen Spicer's rare earth magnet mount for the display of an artifact at the New York Millitary Museum
Cross section of magnetic mount for gloves.
_____________________________
Gwen Spicer is a textile conservator in private practice.  Spicer Art Conservation specializes in textile conservation, object conservation, and the conservation of works on paper.  Gwen's innovative treatment and mounting of flags and textiles is unrivaled.   Her current research focuses on the use of rare earth magnets in conservation treatments.  To contact her, please visit her website.

Learn more about magnets and their many uses in the new publications Magnetic Mounting Systems for Museums and Cultural Institutions. Available for purchase at www.spicerart.com/magnetbook.

Thursday, November 20, 2014

Dust Covers. So many designs, so many choices


Dust covers are critical in protecting collections from light and dust. They are an easily implemented level of protection. Recently SAC created a Tyvek dust cover for Historic Cherry Hill, as a costume hanging unit. The hanging unit to be covered is a chrome-plated Metro International system on large caster wheels. Historic Cherry Hill was fortunate to receive an IMLS grant for the equipment and supplies.

There are many ways to construct a dust cover, thus no set method or set materials are specified for use. In my experience, it is more based on the dimensions of the materials available for the project, and the time and skills to devote to the project, that determines the design (simple low tech vs. complex high tech). Think about those great dust covers at FASNY Firefighting Museum that used magnets to support the Tyvek! FASNY needed covers but did not have the staff time to create complex covers, their low tech solution is fabulous.

Along my travels through the years I have seen covers made of muslin or other types of cotton fabric, even pull-down curtains used for barriers, which is just another case of where solutions for preservation are about available materials and creative minds.

But, back to Cherry Hill's cover.  The construction of the cover was created by the fact that from the base of the unit to its highest point was about the same measurement as the width of the Tyvek. Therefore a full sheet of Tyvek wrapped the sides of the unit and a separate piece was positioned at the top. This required little sewing, just around the upper edge.

The front has a center front opening that is secured with twill tape ties, as seen in the image below. Ties are postioned at the top, and then in several locations down the front opening.

Custom made tyvek dust cover, created and designed by Gwen Spicer of Spicer Art Conservation, New York
The cover placed onto the unit with the front closed.

For this particular cover we added a means to pull back the two panels ("curtains") of the front, to allow for complete and unobstructed access. The center front opening allowed for this to happen. The method we used was to add along the upper edge, a horizontal cord that ran from one far side to the other. Small plastic rings were evenly positioned along the upper edge of the two front opening sides and stitched along the opening. The rings were previously threaded onto the cord, thus acting like a curtain rod.

Custom made tyvek dust cover for the archival storage of historic clothing. Designed and created by Gwen Spicer of Spicer Art Conservation
The cover untied, with the front panels opened.

The cord was secured at each end and at the center. The cord was held taught because the cover fit so well to the unit.

Detail of the front corner with the front pulled open.

Custom made Tyvek dust cover, archival museum storage, Spicer Art Conservation
Reverse side of the dust cover.
If you are wondering how big this cover is, it is very big.  And yes, working with a cover this size is a bit daunting.  We are talking about yards and yards of Tyvek.  This is one reason why the cover was designed to minimize the amount of stitching. Tyvek is inherently stiff and therefore difficult to negotiate with the sewing machine. But we pulled it off, and even made ruffled edges around the giant caster wheels.  A nice touch if we do say so.

We at SAC are happy to have had the opportunity to design and construct this custom dust cover to protect the collections for Historic Cherry Hill.

_____________________________
Gwen Spicer is a textile conservator in private practice.  Spicer Art Conservation specializes in textile conservation, object conservation, and the conservation of works on paper.  Gwen's innovative treatment and mounting of flags and textiles is unrivaled.   To contact her, please visit her website.

Look for Gwen's book, "Magnetic Mounting for Art Conservators and Museums",  available in 2018.

Wednesday, November 12, 2014

Not on THAT hanger! Proper storage of hanging collections

Here at SAC, textiles are our "thing". When pressed to label SAC's specialty in conservation, textiles more than likely come in first, (but gosh we do an awful lot of paper, objects and upholstery!).

Whether it is a silk dress from 1840, or a military jacket from the Civil War, or perhaps a christening gown passed down through generations, historic costume is is an important part of any textile conservator's work. Too often, garments are brought to us in a condition that could have been prevented. The damaging item is sometimes a surprise, as not everyone knows the dangers of acid migration and that the natural organic wooden hanger supporting the prized garment is the thing that is doing the most harm. Wooden hangers, while very sturdy, are made of wood which is quite an unfriendly companion to textiles (as evidenced below). (See Glossary of safe materials for storage).

textile conservation, proper storage, archival materials, damage to artifacts, improper handling or storage
The light color of this jacket lining allows the staining from the hanger to be quite visible

But let us not point an accusing finger to wooden hangers only. It is not just the material a hanger is made of, it can simply be the hanger itself. Perhaps the item is too fragile to hang, or the hanger is far too big for the tiny garment and the arms have been forced out to the side rather than to hang naturally from the shoulders, or perhaps the heaviness of the garment causes undo stress to the fabric at the shoulders, resulting in weekend areas now prone to tears. Another contributing factor is the thickness of the hanger, a thin wire hanger is not as supportive as a thick molded polystyrene hanger, simply because the thicker hangers ease the distribution of weight across a larger area, while the wire creates specific and unforgiving stress points.

Textile Conservator, Gwen Spicer created these hangers to support historic garments.
A few examples of hangers that have been padded in various ways to accommodate specific garment and needs. Notice the hangers at the lower right corner are quite small, perfect for children's garments. The hangers at the top demonstrate covers that support a great deal of the upper portion of a garment, and how you can even add "arms".
When treating textiles that are destined for hanging storage or display, we always enclose an information sheet about creating padded hangers, and many times our treatment includes creating a custom made padded hanger for the garment.

Creating padded hangers might seem like a daunting task, especially to the curator of the historical society with walls lined with racks holding innumerable garments, all hanging from wood, plastic, or those lovely but quite thin wire hangers (a la dry cleaner). I know, you are thinking about dry cleaning bags now too, you are thinking how you've seen them covering antique garments and you know it's wrong…we will talk about this later.

To get started, evaluate the garment you would like to hang, determine the proper type of padded hanger design, and gather your materials. Since the initial idea of a padded hanger back in the 1970s, hangers have come a long way. Conservators and collection managers now have far more options to the original design than ever before. But in all cases, they follow the same simple rules.

RULE #1:  A textile should NOT be hung if it is fragile, or if the hanger causes strain on the garment. These more delicate textiles must be boxed and padded out to prevent crushing from folds. Read more about boxed storage of textiles in our blog post about proper storage and support of textiles .

Good intentions. This hanger is at least covered, but just behind it can be seen the
uncovered wooden hangers. Notice the strain on the shoulder lace. This hanger is
also too wide for this particular garment.
RULE #2: The hanger should not be wider than the shoulders of the garment, i.e. you would not hang a small child's dress on a 17 inch hanger. When the hanger (even if padded) extends into the arms of a garment it creates undo stress and misshape of the garment.

Alternative storage for artifacts, museum storage, art conservator survey of storage space
Hangers can be modified to hold objects as well. Here various items, including snow-shoes
 are hung from hangers and enclosed in an archival bag. In this way any applied stress is even
and visual access is possible. An inexpensive solution at its best!

RULE #3: Selecting supplies and materials is critical to constructing your padded hanger. All materials need to be archival: inert, neutral pH, and will not off-gas.

RULE #4: Never hang knits. Just don't. They will stretch and sag and then the damage is irreversible, so just avoid it all together.

proper storage of historic garments in a dedicated archival space. The garments are placed on padded hangers for support
Suit jackets hanging inside of a storage cabinet. Each of these jackets are in
excellent condition and are able to support their own weight. The hangers are
widely padded to mimic a shoulder. Sufficient space for each suit is also provided.

How heavy is the garment you are hanging? Robes, coats, capes and heavily adorned costumes are particularly heavy. Evaluate these appropriately with consideration to the strain on the shoulders to hold all that weight.

There are some other advantages to padded hangers. The material that covers the hanger provides a gripping surface so the garment can "hang on" and not shift much once it is placed on the hanger.

proper storage, padded hangers, museum archives, art conservation
A row of padded hangers in a storage cabinet.
Hangers not only come in different sizes, there are other shapes as well. The Pants hanger, or the strait style hanger with clips is another frequently used item that needs re-evaluation. The clips are just too harsh, they cause crushing, severe pressure points, and usually sagging of the garment in between the clips. The alternative here is the hanger that works more like a strait clamp. These types of hangers can also be padded and provide support that is evenly distributed, this is a much more gentle approach. But keep in mind the length of the hanger and the what it is supporting.  If the waist of a skirt extends well past the clamp edges, it is too large for this type of hanger and is not being properly supported.

The wonderful thing about padded hangers is that they don't have to be expensive. In fact, I am reminded of the Canadian War Museum's ambitious project back in 1999, when they had a backlog of 15,300 (!) clothing items. They needed a quick, archival acceptable, but inexpensive solution and came up with what they dubbed "insta-hangers". Using 1" pipe insulation made from closed cell polyethylene, they covered hangers and got to work.  Ingenious!

Need some illustrated instructions to create your own padded hangers? Lots can be found on-line. Here is a link to Minnesota Historical Society's instructions for making a padded hanger: http://www.mnhs.org/preserve/conservation/reports/paddedhanger.pdf
Also, a step-by step method for creating padded hangers as well as cotton muslin coverings from blogger, Sara who works as a curator: 
And last, but not least, the NPS Conserve O Gram from 1994:

In our next blog we will discuss dust covers and how they keep unwanted things (i.e. dust, debris, cat hair, etc…) off of your textiles.

_____________________________
Gwen Spicer is a textile conservator in private practice.  Spicer Art Conservation specializes in textile conservation, object conservation, and the conservation of works on paper.  Gwen's innovative treatment and mounting of flags and textiles is unrivaled.   To contact her, please visit her website.